Lux documentation
Essentials
A Lux program needs a few essentials. With them, you will be able to write programs which use basic 2D and 3D graphics.
Marks
Lux provides some visual primitives which you can use to draw graphics. Marks are almost ready-made: you give a few details and Lux returns an object ready for drawing:

// A scatterplot is a set of dots with specified scales for x and y
var scatterplot_batch = Lux.Marks.scatterplot({
    x: iris.sepalLength,
    y: iris.petalLength,
    x_scale: Shade.Utils.fit(iris.sepalLength),
    y_scale: Shade.Utils.fit(iris.petalLength),
    fill_color: Shade.color('red'),
    stroke_color: Shade.color('black'),
    point_diameter: 10
});
You then add the object to the scene:
Lux.Scene.add(scatterplot_batch);
... and you're done.
Models and Batches
Under the hood, a mark is actually created by taking a model and giving it an appearance. Lux provides some predefined models which you can use to construct your graphics. For example, you create a cube like this:
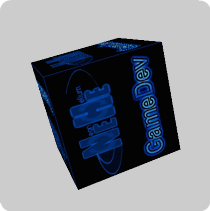
// The default cube is centered at the origin and has side length 2
var cube = Lux.Models.flat_cube();
With a model in hand, you create a batch, which determines how the model is actually drawn on the canvas. A batch is created by Lux.bakeing a model and a appearance. First, you need to specify where the model vertices will appear on the canvas. Lux provides "synthetic camera" classes, which project the model onto the screen in the same way that a photographic camera projects light onto a film. You use them as follow:
var camera = Shade.Camera.perspective({
    look_at: [Shade.vec(0, 0, 6),  // the position of the camera,
              Shade.vec(0, 0, -1), // towards where the camera points,
              Shade.vec(0, 1, 0)], // and towards where its top points;
    field_of_view_y: 45,  // vertical angular extent into the scene;
});
The project method of the returned object will return a vertex, appropriately transformed.
Finally, we need to tell Lux how to color the model. In the simplest case, we can just use a solid color:
var batch = Lux.bake(cube, {
    position: camera.project(cube.vertex),
    color: Shade.color('blue')
});
Lux.Scene.add(batch);
Voilà!
Custom Models
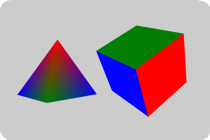
When the predefined Lux marks and models become too restrictive for your needs, you can easily create objects with customized appearances. The main way to define the appearance of a Lux object from scratch is to create a custom model, and bake it into a batch. The function Lux.model is used to specify the model. Let's say our model is a square:
var square_model = Lux.model({
    vertex: [[-1, -1,
               1, -1,
               1,  1,
              -1,  1], 2],
    color: [Shade.color('red'),
            Shade.color('green'),
            Shade.color('blue'),
            Shade.color('white')]
    type: "triangles",
    elements: [0, 1, 2,
               0, 2, 3],
});
Lux models can be of a few different types. Here we are using triangles, so our model will be a set of triangles. The vertex attribute specifies the positions of the vertices and the dimensions, and they can be in 2, 3 or 4-dimensional (homogeneous) space. Here we're using 2D, but notice that the coordinates are passed in a flat list. The elements attribute tells Lux how to make (in this case) triangles out of those vertices, and specifies the indices into the list of vertices, three at a time. So there'll be two triangles, 0,1,2 and 0,2,3. Finally, we specify that these model's vertices should also have an associated colors attribute. All attributes (in this case only the colors) in a model are associated to the respective vertices in the list order. This model can be baked into a batch like the one above:
Lux.Scene.add(Lux.bake(square_model, {
    position: camera.project(square_model.vertex),
    color: square_model.color
}));
Setting up a Canvas
Lux needs an HTML canvas element in which to draw. Your HTML page should have something like the following:
<body> ...
  <canvas id="lux-canvas" width="640" height="480"></canvas>
</body>
To initialize a canvas with the appropriate features, simply call Lux.init:
function draw_it()
{
    batch.draw();
}

var canvas = document.getElementById("lux-canvas");
gl = Lux.init(canvas);
Lux.init takes an optional extra parameter with options that control things like the background color, an explicit display callback, and other WebGL miscellanea. For more details, refer to the API reference.
Demos
If looking at examples of complete applications is your cup of tea, Lux comes with quite a few demo scripts.
API Reference
Lux
TBD.
Shade
TBD.
Linalg
TBD.
Data
TBD.